Chicken, Leek and Green Chilli Pie with Potato Crust

This recipe is an adaptation of a lovely recipe blogged recently by Cooking up the Pantry. The original recipe does not include the green chillies and olives used here and was gluten free which this is not. If you are looking for a gluten free recipe head on over and visit Cooking up the Pantry . Many thanks for the inspiration – great food to put on the table.
IMG_8159IMG_8162Put the oven on to warm at about 190°C . Take one large leek or two smaller ones and slice into rings. Push out the rings so that they seperate and wash under cold running water. It is important to wash leeks well as soil can get trapped between their layers as the plant grows. Put a large knob of butter into a pan on a low heat and then add the leeks. Cook for about ten minutes until tender.  Once cooked add a third of a cup of plain flour and stir over the heat for two minutes. Pour in two cups of chicken stock – preferably homemade but otherwise made up from stock powder or using commercial liquid stock. I prefer homemade because then I know exactly what went in it. If I have to use a commercial product I use Massals powders as they have no meat content but the vegetable and spice profile mimics chicken flavour.

To the leek mixture add about 500g of cooked chicken chopped into pieces, a deseeded and finely chopped chilli, two finely chopped cloves of garlic and a handful of chopped flat leaf (Italian) parsley. Take off the heat and spread in a heat proof casserole dish. I added Kalamata olives to half of the dish as I love the flavour hits that they provide but my son does not! Put to one side.


Either use some left over mashed potato or, as I did here, start from scratch and steam some potatoes. I love it when I can go out into my winter garden and find food – today it was potatoes that I had not yet harvested! Once cooked mash well and add a little salt and pepper.

IMG_8168 Take about 500g of mashed potato and add 100g of chopped butter, 1/4 cup of plain flour and 1/2 teaspoon of baking powder (I sifted the flour and baking powder together on top of the potato).  Then using hands gently work the potato mixture together into a soft dough. Put the dough on to a floured board and press out until about 1/2cm thick. Use a scone cutter to cut out potato rings and place them on top of the leek and chicken mixture. Left over potato can be pulled back together into a ball and pressed out again. Once the casserole is covered any extra potato can be shaped into more rounds and placed on a buttered tray. I sprinkled the ones I made with finely grated cheese and smokey paprika. Place the trays in the oven and bake for about 40 minutes or until the potato crust is crispy and golden. The free standing potato rounds may take a little less time to cook but I put the casserole in first and then used up the extra so that they came out of the oven at about the same time.


Serve with steamed vegetables that put colour on the plate – dark leafy greens, beans, carrot sticks, sweet corn – choose from your favourites and what is available in your refrigerator at the time. For us it was Brussel sprouts and green beans left from some bought yesterday to go with dinner last night. Buying in small quantities and planning how we use them reduces food waste and ensures that vegetables are as fresh as possible but we also have to be realistic about how often we can shop.

Set the table and serve up – food on the table! Enjoy

IMG_8172


Family Favourites and the Role of Tradition – featuring the humble Pineapple Upside Down Cake

I hope every family has its favourite meals and its own family traditions; both help mark the passage of seasons and the passing of time. They help us to stay connected to our family and to our roots and as we grow older they are powerful memories of the past and of special people and events.

Favourites are not necessarily anything particularly spectacular, just part of the fabric of life. Last night I made a couple of ours – good old fashioned roast chicken with baked root veggies and steamed greens followed by the humble pineapple upside down cake. Roast chicken I have found to be one of those meals that meets many people’s comfort food guidelines. After a big day outside, in the cool of the year as it is at present in Tasmania, sitting down to a hearty meal rich in protein and vegetables with lots of colour on the plate leaves one feeling nurtured and loved – even when its you that did the cooking. My vegetarian friends clearly pass on the chicken but enjoy the range of veggies; the chicken can be replaced with a cheese sauce for the steamed vegetables or with the addition of something like marinated tofu that can be added to the baked veg.

IMG_8132
Enter a caption

And as for pineapple upside down cake – it is something that comes out as the weather cools because I will almost always have the ingredients at hand, its quick and easy to make and basically fool proof! Last night I made it at the request of my son who has been feeling a little under the weather and obviously in the market for some TLC. As I dished it up he said “You know this is one of the first things I remember learning to cook with you and I wrote it down in my recipe book at the time!” His words reminded me that, in the manner of good traditions, it was also one of the first cakes that I remember cooking both at school and with my mum and I still have that recipe written in a very young hand in my first recipe book!

The recipe has evolved a little over time with the glacé cherries of my childhood being replaced with what I consider to be far superior bottled maraschino cherries – they taste so much better but do rather stain the pineapple so if you want the perfect look stick with  the glacé variety.

IMG_8130

Start by putting the oven on to heat at about 200°C – I say about because you know your oven better than anyone else. Put a large knob of butter into a nine inch pan or equivalent; last night all I could find was my square pan which holds 6 pineapple rings quite well as long as you cut one up. Melt the butter in the warming oven being careful not to let it burn. Remove from the oven and use a brush to ensure that the sides of the pan are well greased then sprinkle a little sugar across the base of the dish. Traditionally I use soft brown sugar but last night I only had raw  so that was what I used. Drain a can of sliced pineapple rings – I choose the ones packed in pineapple juice as they have a better flavour and less sugar. Reserve the juice for making the cake mixture and lay the rings in the baking tin. Place cherries of your choice in the centre of each ring and in any other spaces in the pattern that you care to fill.

IMG_8131  IMG_8133


The cake mixture is made by creaming together half a cup of raw sugar and about 200g of butter – I use normal salted butter but you could choose unsalted. At home I like to work by hand most of the time as I hate cleaning machines and the fuss involved in finding all their pieces but feel very welcome to get out the hand held beaters or the mixer – your choice. Once the butter and sugar mixture is light and fluffy crack an egg into a cup and beat lightly with a fork. This needs to be added to the butter mixture a little at a time and beaten in well before a further addition or you run the risk of the mixture curdling. This is easiest with a mixer but when doing it by hand I add a little flour after each addition of egg and this seems to help prevent problems. The flour I am using is 1 1/2 cups of plain flour with 3 teaspoons of baking power added and both sifted together – you can use self raising flour but I prefer to make my own. Self raising flour that sits for too long unused can lose much of its raising capacity and flour in general can get stale and prone to those nasty little weevils. Thus I prefer to stock my basic flour and add baking powder according to the instructions on the packet (mine says 2 teaspoons to a cup of flour).

Once the egg has been added the remainder of the flour needs to be beaten into the mixture together with enough liquid to make a dropping consistency. For liquid I start with about half of the juice from the pineapple and then milk until the consistency feels right. Some of you will be saying what does ‘feels right’ mean? Unfortunately there is an element of cooking that, as I have said in a previous post, is not an exact science but rather part of the art and that involves becoming a part of the process and using your instincts and feelings – the more you cook the better these get. Once upon a time I did not believe that I would ever make a cake without a recipe – savoury dishes maybe, but cakes no! Then came the day, pre Google I would add, when I was somewhere with no recipe plenty of ingredients and friends looking for cake – and I thought “Heck I have made enough cakes over the years to know the basic principles – just give it a go!” So I did and it worked fine. Have courage – what’s the worst that can happen?

Once the batter is ready, spoon it into the centre of the cake tin and use a palette knife or similar round bladed knife to spread the mixture evenly to the edges of the tin. Place in the middle of the oven and cook for 15 minutes. Check on the cake and turn it through 180° because most ovens do not cook perfectly evenly. If it seems to be browning quickly turn the oven down to 180°C and cook for a further 5 to 7 minutes or until a skewer poked into the centre comes out clean. Remove the tin from the oven and allow to stand on a cooling rack for about 5 minutes before turning out carefully onto a serving plate. The cake should pull away from the edges but if not slide a knife around the edge before trying to turn out. Serve with your selection of pouring cream, whipped cream, ice cream or  custard.

And enjoy!

IMG_8134

Please note the photos I use here are taken as I cook meals that are the food that we will be eating and part of my normal day – I make no claims to being the world’s greatest photographer and I have little capacity to spend my time ‘prettying up’ my photos. So what you see is what we eat, cooked in a ‘business as usual’ family kitchen – warts and all! If yours looks better I would love to see the results and welcome your thoughts on what I share.


A Steaming Pot of Goodness

Winter is a great time to be in the kitchen. Days close in quickly and there are fewer distractions from the outside world. The garden is slowing down and its siren call not as loud or insistent. There is time to experiment and fill the house with the aroma leaking from a slow cooking pot on the stove. That was today’s play – sitting in the fridge was some chicken mince that my son had bought on special and needed using. It reminded me of what my mum used to call her Greek chicken meat balls and I decided I would see what I could do.

IMG_8114

The fridge and pantry supplied a range of ingredients – purple shallots, parsley, green and red chillies, garlic, celery, onions, carrots, capsicum, basil pesto, tomato paste, lemon, stock powder, tamari, olive oil, plain flour, rice, salt and pepper. Out of the garden came fresh oregano and silverbeet. The dish I created was inspired by a memory but determined by what was at hand. For me that is the essence of much of the real cooking that goes on in a home – using what you have to best advantage. If you are not comfortable with this, these days we also have the option of putting some of the key ingredients into Google and asking for ideas!

IMG_8116   IMG_8117

The silverbeet I washed, cut off the stalks for the chooks and then sliced before steaming for a few minutes until tender. It was strained, the water pressed out of it with a saucer and then it was chopped quite finely ready to add to the meat, together with finely chopped garlic, green and red chilli, a couple of purple shallots and some extra shallot tops left from another dish, the oregano and a handful of flat leafed parsley.

IMG_8115   IMG_8119  IMG_8118

In addition I added a large teaspoon full of basil pesto, grated rind from a lemon, a squeeze of the juice, a large splash of tamari, two eggs and salt and pepper. Then it was one of those moments when you choose between stirring hard with a wooden spoon or getting more personally involved. I prefer to use my hands and really work the ingredients together until well mixed.

IMG_8120  IMG_8121  IMG_8122

Once mixed I used a teaspoon to measure out small to medium sized balls of the mixture which I rolled in seasoned flour. The floured meat balls were placed on an oiled tray and baked in a hot oven – 200°C – for about twelve minutes.

IMG_8123  IMG_8125  IMG_8124

While the meatballs were cooking I put some rice on to cook in the rice cooker and set out to make a base in which to put the meatballs. In a little olive oil I sautéed chopped onion, and celery then added a few chopped carrots. Once the meatballs were cooked to a point where they were set I added them to the pan and covered them with boiling water. Then I stirred in another handful of chopped parsley, a sachet of tomato paste and two teaspoons of stock powder. The one I use is Massals which is a vegetable based powder but with a taste profile resembling chicken.

IMG_8126

I left the pot to simmer for about thirty minutes, enough time for the aroma to drift through the front half of the house and for the rice to finish cooking. A quick taste and a little adjustment to the seasoning and a passable relation to my Mum’s Greek chicken meatballs was ready to hit the table!

IMG_8128


Breaking Bread – the Real Stuff!

This is part of the culinary heritage that I received from my Dad. He liked to make bread at the weekend. He and my Mum would usually take off to our ‘shack’ on the East coast and there he would work in his vegetable garden and make bread. Both activities that are great for relieving stress. I believe that this approach to life has contributed significantly to the fact that we still have Dad’s company as he heads for ninety!

Dad made all sorts of bread from plain white loaves and masses of different buns through to fancy breads and our favourite Chelsea buns. Today’s blog is about some very basic bread and how it features in my family menu. I have a very useful recipe that I have found works for me and is versatile and flexible.

IMG_8100


I start with 1 1/2 cups (375 ml) of lukewarm water in a small bowl to which I add 1 level teaspoon of sugar – it doesn’t really matter what type – and two heaped teaspoons of granulated yeast. If you prefer to use baker’s yeast adjust the quantities accordingly. I prefer the ‘instant’ yeast as my bread making can be very on and off and it keeps in the pantry. Stand the bowl in a warm draft proof place for about fifteen minutes until you can see that the yeast is working and has created a lovely foam on top of the water.

Meanwhile sift 4 cups of flour into a large bowl. This is where the versatility and experimentation comes in. I find that most flour works for the majority of what I want to do. Often I simply use my standard good quality Tasmanian Four Roses flour that is a pantry basic. When I want a treat I invest in boutique Carrington Mill flour from the Tasmanian midlands. If I am looking to make bread loaves I will sometimes ensure that I am using recognised bread flour as it helps to produce a good crumb in a loaf but not one that crumbles! The buns in the photo were made from 3 cups of plain flour and one of rye giving a light rye that I enjoy.

Add a level teaspoon of salt to the flour. Measure a quarter of a cup of olive oil and stir it into the yeast mixture once it has foamed. Then make a well in the middle of the flour and pour in the yeast mixture. Use a round bladed knife to cut the flour into the liquid working until the whole comes together to from a rough ball. Sometimes it is necessary to adjust the mix by adding a little water if too dry or a little flour if wet and sticky. Every batch of flour has its own characteristics so this is not an exact science!

Now either knead the mixture in the bowl or if you prefer turn it on to a floured board. The best kneading is done with the heel of your hand – pushing the bread away from you so that the dough folds in half then turning the bowl or dough through ninety degrees and repeating the movement. We use my mum’s old heavy ceramic bread bowl that Dad always used. The advantage is that it is big, easy to work in and stays on the table. I prefer to knead in the bowl, kneading with my right hand and turning the bowl clockwise with my left. Ideally the dough should be kneaded for about ten minutes until smooth and shiny. If you have kids let them loose on it – Mum used to make bread with under fives at the play group that she ran and the kids produced great results because they loved to work the dough. Kneading is good for the soul – it gives you a productive, acceptable way of releasing the tensions of the week – it fine to punch the dough, twist it, lean on it … I am sure you get the picture – all the things that even the most pacifist of us feels occasionally like doing to wayward bosses, clients, employees or kids! Feel like twisting ears? Make bread!

You can’t really over knead the bread but once you are happy with the result place the dough with its smoothest face up, in a bowl that has been rubbed with olive oil and that will allow it to double in size, . Cover with a damp cloth and return to that warm, draft free place to allow it to rise. The aim is to let it double in volume – how long this will take rather depends on your yeast, the bread mixture and the weather. I usually allow about an hour. If, like me, the bowl sits near the wood heater turn it every so often so that the heat is evenly distributed and do not let it get too hot.

Once the dough has risen knock it down by punching your fist into the centre of the dough – another great moment! Knead it lightly and then decide what you are doing next. For the buns pictured here I would give the dough another five minutes kneading then cut it into even pieces and shape each into a bun laying them with their ‘tidy’ side up on an oiled baking tray. If you sit them fairly close together they will join together as they rise and then cook – you get the sort of buns that you pull apart. Mine I placed apart as I wanted individual crusty buns. Once the buns are formed cover them with the cloth and put them back to rise until doubled in size. Meanwhile pre heat your oven to 200°C. Once risen I then dust them with a little flour and put them into the oven for about 8 to 10 minutes – again timing can vary depending on conditions and the size of the buns. They are done when they look right and sound hollow if you knock on the bottom of a bun. Take out and place on a cooling rack so that the bottoms do not collect moisture as they cool.

IMG_8102

When I make bread I want it to count – its not inherently difficult but it takes time and a little organisation so why not make the most of the experience. So I think through what I want to get from the exercise  – on this particular occasion I divided my dough using the majority to make eight bread buns. While these were rising I used the remainder of the dough (about a fifth of the original) to make flat bread; I rolled out two pieces of dough until they each covered a tray then baked them in the oven for about 7 to 8 minutes until golden  – this was a little bit of a work in progress because I had hoped to use them as wraps but even put straight from the oven into a clean tea towel they still dried out. Change of plan – I used them during the week for lunch with a bowl of avocado, chopped tomato and cheese. While I was at it I reserved one small piece of dough that I rolled out into a round, brushed with a little olive oil ant topped with basil pesto, sliced camembert and sliced Kalamata olives, all from the contents of the fridge – 10 minutes in the oven and I had lunch! Yum!!

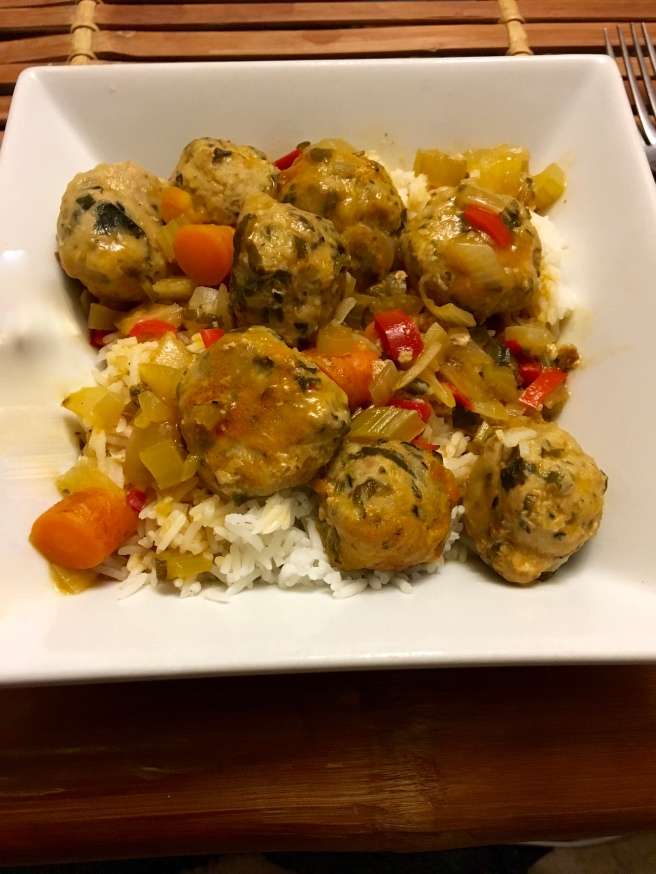
The buns were destined for dinner with homemade beef and vegetable patties with blueberry and chilli chutney and then the remainder we had for lunch next day with cold meatballs (made from half the patty mix and cooked at the same time) and salad. In total this batch of bread contributed to seven individual meals over the course of the week – and cost very little other than my time – much less than dollar a meal.

There are lots of combinations that I make including pizzas for dinner with calzone made for lunch the next day, soft pretzels to go with soup and a small loaf to use later – I will explore yeast cooking more in a future blog but please if you haven’t tried this type of cooking please give it a go! Your home will have that wonderful scent of fresh baked bread, it will inspire other cooking like the meat patties here and when you are done you will feel great and there will be food on the table!

Cheers!


Using it all!

My last post was my winter warming pumpkin and peanut soup; I promised to share what happened to the pumpkin seeds.

Food waste is a huge issue in much of the western world with unforgivable mountains of food ending up in landfill – I was reading the other day that one of the top three vegetables grown in the US, and it probably is similar here, is lettuce a huge percentage of which forms garnish on restaurant dishes and is rarely eaten!

Here at home I am committed to doing what I can to ensure that we do not contribute to food wastage. Our simplest strategy is out in the garden. Any food scraps, unless it something that they should not eat, go to our gluttonous chooks. Most I simply collect in a bowl in the kitchen and take out with their grain but at this time of the year, with the cold of winter setting in, I also try to make them hot mash a couple of times a week. I cook up oats and add any veggie scraps that I might have, together with garlic, ginger, chilli and mixed spice – all of which help the condition of our chickens. Sometimes a member of the family will put a head round the door and say – that smells good, what’s cooking?! So the pumpkin peel found a home in a chicken;s belly! Chooks are great composters and produce wonderful ready fertilised soil for my veggie garden. What they can’t or shouldn’t eat goes into our compost and also will find its way back into the garden.

But what about those pumpkin seeds?

IMG_8096

The other night, while watching something pretty mindless online, I had one of those infuriating pop ups appear. This one however grabbed my attention as it was about making your own tasty snacks; again I am interested in knowing exactly what goes in our food and snack food is notorious for having lots of  hidden ‘added extras’. I hear a few mutters of ‘shouldn’t be eating snacks’ but I beg to differ – there is a time and a place for a little added energy like out on a bush walk, when pushing to meet a project deadline late at night or just sociably with a drink.

The recipe was for spicy chickpeas and I set out to make this while preparing my pumpkin and peanut soup. It was dead easy – take a can of chickpeas (or soak dried chick peas overnight) and rinse under cold water. In an open bowl put about three teaspoons of spice – the mix is really up to your taste buds, I used two teaspoons of paprika and one of hot chilli powder but having tried them I can see that all sorts of combinations could work. Add a little salt and ground pepper. I have a passion for Tasman sea salt from Tasmania’s wonderful East coast where I know the water quality is good and where I am supporting our own local business! Tip the chickpeas in on top of the spice and toss together until the peas are well coated with the spice mix. Spread out on a baking tray and put in a 200°C oven for about thirty minutes stirring about every ten minutes. Turn the oven down to 180°C and continue to cook until the chickpeas are crunchy – mine took about fifty minutes; you have a great excuse to taste them periodically! Allow to cool and then place in an airtight container – my preference a recycled glass jar!

IMG_8093

IMG_8094


IMG_8095

But where are the pumpkin seeds? As you can see from the photo the pumpkin is still in tact in the background! Once the chickpeas were in the oven cooking I got on with the soup starting with cutting up the pumpkin and removing the seeds – I had a hot oven with some extra space so I squeezed the seeds out of their pulp, spread them on another tray, ground a little salt and pepper over them and dusted them with a small amount of chilli powder before putting them in the oven alongside the chickpeas. You have to watch them as they need nowhere near as long to crisp up! Once they have dried out and gone golden pull them out and let them cool.

All thats left to do is to try to avoid eating them all at one sitting! Fill a good looking jar, add a label and you have a gift with a difference – homemade, tasty and good to eat!

And all the pumpkin used – no food waste!

IMG_8097
Spicy Chickpeas and Roasted Pumpkin Seeds with a Hint of Chilli

Food on the Table Tasmania!

Over the last few weeks I have found myself in a number of conversations, reading articles and watching videos that have common themes, and themes important to me. It is all about food! Another food blog I hear you think to yourself. Food is fashionable and everyone has a food blog, follows one, watches cooking programs, collects recipe books, knows the coolest places to eat, is up on the latest super foods, is low carb, vegan, paleo, primal …

Despite all this hype and interest our health as a state in Tasmania, where I live, is woeful! We are blessed with clean air and water, good rainfall, and a temperate climate and we produce some of the greatest food in the world; recently we entertained the world’s leading chefs and foodies to dinner at MONA (the Museum of Old and New Art) to showcase Australian food. Yet most Tasmanians eat far less than the recommended minimum of two serves of fruit and five of vegetables a day and we have alarming rates of obesity, type 2 diabetes and other diet related health issues. And we are not alone in this. Much of the western world has similar issues and the same trends are emerging in other nations as they industrialise their food.

None of this is new and it hasn’t happened overnight although, in terms of our ‘bigger picture’ life on earth, many of the issues we face are relatively recent, escalating over the last fifty years. There are plenty of switched on people who are trying to make a difference and ‘banging on’ about the need for more fresh fruit and vegetables and less processed food in our diets but we do not appear to be having the desired effect! Why not?

That is what I want to think about and explore in this blog. I am not arrogant enough to expect to change the world but my hope is that I can inspire a few other people, fellow Tasmanians and some of you from farther afield to consider how we, as individuals, can make a difference and turn the tide here in Tasmania and elsewhere.

My first assertion, and derived from it the name of this blog, is that we need to put food back on the table! Preferably on plates not out of boxes, polystyrene cups, paper bags or the like. Real food that my great grandmother would recognise as food. And that we sit down and eat it together.

IMG_4877

The photo is of a meal that I sat down to recently with a group of my extended family. We talked, laughed and ate together; we ate food that my daughter had prepared that included a big variety of vegetables, some cooked and some raw, together with meat, cheese, egg, bread and fruit. This is something that I believe we do not do enough of – eat together, eat well and eat real food!

I hope you will join me in in my challenge – to explore how we can make a difference. What are the obstacles, what are the issues, how can we help each other?